Tips for Improving Your Bullet Journal Quote Pages
Bullet journaling is a way to keep your life organized, but it also has an artistic DIY side to it. Adding quotes to your bullet journal is a fun way to inspire yourself. You also can practice your calligraphy and art skills by making quote pages in your bullet journal. This post contains my best tips and tricks for improving your quote pages!

Side Note - This post may contain affiliate links, which means if you buy something from one of these links, I may receive a small commission at no cost to you. For more information, you can read my privacy policy. Thank you for supporting my blog. :)
Updated for 2024
If you don't know what bullet journaling is, but you want to try it out, you can read Bullet Journaling: What Is It?
In this post, I will cover the basics of picking a quote, to choosing fonts, all the way to setting it up on the page. Whether you have created many quote layouts, or you are looking to get started, hopefully this post will have some tips that will help you!
Tips for Improving Your Bullet Journal Quote Pages
Let's start with the basics and then go from there. The first thing you need to make a bullet journal quote page is, of course, a quote.
When picking a quote, the only thing you should keep in mind is the length of the quote and how much space you have.
- Are you doing a full-page quote layout?
- Or are you using it on a weekly or monthly layout?
If you are using a quote to fill space, then you might need to do a shorter quote, so you don't run out of room.
If you are a beginner making your first bullet journal quote layout, you can get some inspiration by typing "bullet journal quote inspiration" into a search engine and there are a ton of ideas to help you out.
But if you want to start from scratch, then pick any quote you fancy and let's get into setting up the layout!

Setting Up the Bullet Journal Quote Page Layout
Okay, you have your quote and maybe you also found some inspiration on Pinterest to give you some ideas. Now it's time to actually set up your layout.
Finding Fonts to Use in Your Bullet Journal
A big problem I use to have when I made bullet journal quote layouts, was trying to figure out what fonts to use. I used the same fonts all of the time, and I was becoming really bored of using them.
The solution?
I found Creative Market, which for the purpose of making bullet journal quote layouts, you can use for free. Creative Market has tons of different absolutely beautiful fonts. So, if you need some font ideas for your bullet journal quote layouts, head over to Creative Market and find a font you like.
Once you have found a font you like, click on it and then scroll down on the page until you see a box that says, "Type to try it out". Now all you have to do is type in the word you want to write in that font and then voila! You now have a new font to use in your bullet journal!
Creative Market has script fonts, serif fonts, and sans serif fonts, so you are sure to find something you like!
For a quote page, I usually use 1-3 fonts. If I use a bold font, then for the cursive I pick something without thicks and thins to balance the fonts out. For the bullet journal quote page in the picture above, I did "perfection" in capital letters, so I did "progress" and "not" lowercase.
Doing a Rough Draft
Yes, just like writing rough drafts of papers for English, it's also a good idea to do rough drafts for bullet journal quote pages.
Sometimes, I skip doing a rough draft, and I freehand everything, but especially when I am doing a new font, I like to sketch the layout using a pencil first. It definitely reduces the number of mistakes I make! :)
Decide what words you want to be in which font. To do this, read your quote, and decide which word or words you want to stand out.
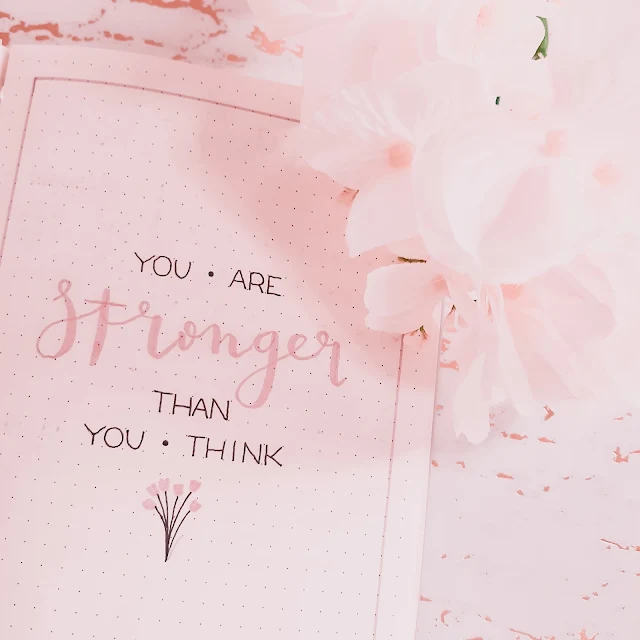
For the bullet journal quote page below, I wanted "stronger" to stand out, so I did it in calligraphy.
Plus, it's best to start out by writing the words you want to stand out first, so you can position the other words in the quote around the words you want to stand out.
Use a ruler! When doing capital letters, you can use a ruler to make your letters straight on the page, and you can make your letters themselves straighter.
Centering Words
I had to make a whole section on centering words, because I know it can be very frustrating trying to center words on the page. Here are two ways you can center words on the page, without having to write and rewrite the word over and over again!
1. Write the Middle Letter of the Word First
Easy right? This only works for fonts that are not cursive scripts. For the word "than" in the picture below, I would have counted to the center, and then written the "h" on one side, and the "a" on the other side of the center line. Then I would write the rest of the word moving out from the center so I can get perfectly even spacing.
If you are doing two or more words on one line, you can use the same principle as long as you make sure to remember to account for the space in between words.
2. Eyeballing It
I use this for when I am doing a cursive or script font. I write out the word in the font I am using, but I use a pencil. Then even if it isn't centered, I know how much space the word is going to take.
When I write the font using a pen afterwards, I simply have to "move" the word over as many spaces as I need to center it and then erase the pencil marks afterwards. If you aren't using a script font, then I definitely recommend using the method above because it works better. :)

Filling Blank Spaces
After you have written out the words on the page with a pencil, most likely you will have some blank spaces left over.
For the layout above, I added too much spacing between the words, so I add the bullet points in between, to make the spacing look intentional.
And let me just say, that blank spaces on layouts can make your layout look more aesthetic. You definitely don't need to fill up every space on the page! Just look at the bullet journal quote pages I have in this post, and you will see that I leave blank spaces on my layouts a lot of the time.
Depending on the look you are going for, you might add some floral doodles, dots, or even adding some lines can make your layout look more finished.
Doing the Actual Bullet Journal Quote Page
Yay! Your rough draft is done! Next up is the fun part: picking out what pens to use, and the color palette.
Choosing What Pens to Use
First off, eliminate the pens that don't work in your bullet journal because of the thickness of your bullet journal pages if you still have any of those lying around.
Other than that, it is pretty much up to you. If you have calligraphy on your layout, you will probably want to use a calligraphy pen, and the smaller the lettering, the smaller the tip of your pen needs to be.
The brush pens I like and use regularly are listed below.
- Tombow Dual Tip Brush Pens
- Tombow Fudenosuke Hard Tip + Soft Tip Brush Pens
- Ecoline Brush Pens
If you are planning on using a pen that smears, make sure you do the other words first, or wait a sufficient amount of time before doing the rest of the bullet journal quote page.
Just like when you are making the rough draft, the easiest place to start, is by doing the words which you want to stand out.

Picking Out Colors
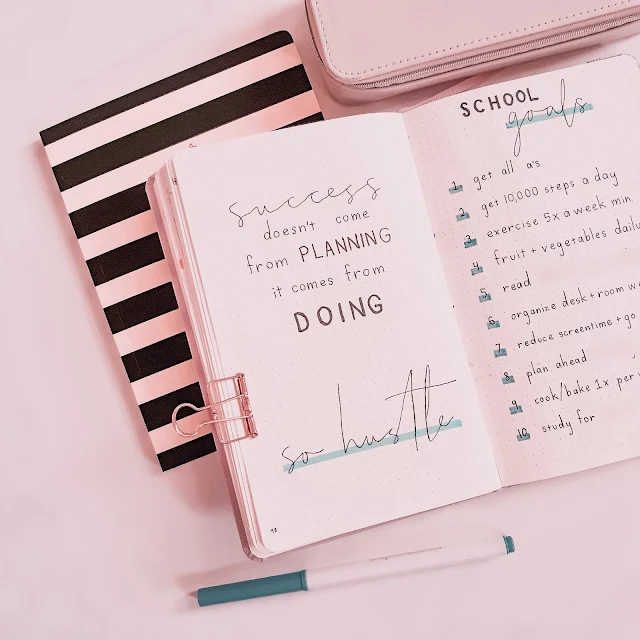
I use a max of five colors, but mostly I use less than three colors. Sometimes I make my layouts black and white like in the photo above.
If I am doing a quote on a layout, then I use the same colors as the rest of the layout, and if I am doing a full-page quote, then I use whatever colors I want.
If you want a word to stand out, then you might have it be the only word in a different color, like for the bullet journal quote page above, I wrote "different" in white and everything else in black to make the word "different" stand out. I didn't have to use a different font.
Now all you have to do is write the words in and add decorations to make it look finished!

Fixing Mistakes
Okay, the worst has happened! You are feeling like gluing the pages together, or even ripping out the page. What can you do to fix your mistake?
- You missed a letter in a word - I would use a white gel pen to cover it up, or squeeze the letter in if I can
- A word is off-centered - If it isn't off-centered very much, then I just leave it, but if it is off-centered a lot, then I add another element, like a doodle, to the page to center the word.
- You don't like how a word looks - When this happens, I add a decoration to the word (Outlining it, drop shadow, etc.), or if I hate it, I will use a glue stick to cover that part of the page.
- Smeared letters - A white gel pen is your friend!
Tips for Improving Your Bullet Journal Quote Pages
That was a lot to cover, so let's sum up the information in this post. :)
- Find inspiration using a search engine or Pinterest
- Find new fonts to use on Creative Market
- Use 1-3 fonts + make sure they are balanced (Bold font with thin font, script font with serif font)
- Use a pencil + a ruler to make a rough draft
- You can center words by...
- Writing the middle letter/letters first
- Eyeballing it
- The entire page doesn't need to be filled up
- Mistakes are going to happen, but they are fixable!
If you liked this post, you might also find these ones helpful!
- Using Ecoline Brush Pens in My Bullet Journal
- All of My Bullet Journal Supplies + How I Organize Them
- 36 Bullet Journal Layout Ideas for When You are Bored
- How to Bullet Journal When Feeling Uninspired
Making bullet journal quote pages just takes practice, so keep practicing and your lettering and layouts will definitely improve!

If you have a moment, please pin this article. Thanks! :)


0 comments